Roof shingles are more than just a protective cover for your home; they play a crucial role in defining its aesthetic and structural integrity. From asphalt to slate, choosing the right type of shingle can significantly affect your house’s appearance and durability. This guide breaks down the various types of roof shingles, their installation processes, and maintenance tips to help you make informed decisions.
Understanding the differences between the materials, the best practices for installation, and routine care can save you time and money in the long run. Whether you’re building a new home or updating an existing roof, knowing how to choose and maintain roof shingles is essential for ensuring your home stays safe and stylish.
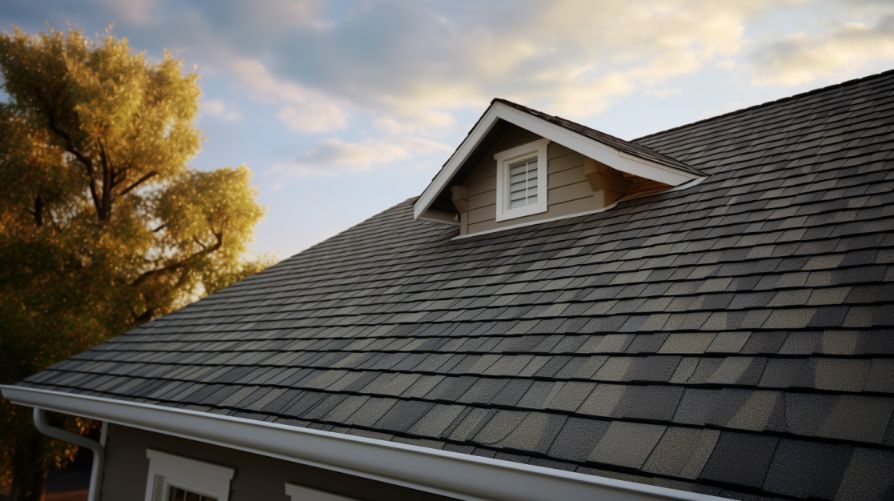
Types of Roof Shingles
When it comes to choosing roof shingles, understanding the different types available is essential for making an informed decision that suits both your home’s aesthetic and environmental needs. The right shingles can enhance your home’s curb appeal and provide necessary protection against the elements. This section will break down the four most common types of roof shingles: asphalt, wood, metal, and slate, along with their advantages, disadvantages, and best practices for selection.
Asphalt Shingles
Asphalt shingles are among the most popular roofing materials in North America, accounting for approximately 80% of the residential roofing market. They are made from a base of fiberglass or organic materials covered with asphalt and granules.
Advantages of asphalt shingles include:
- Cost-effectiveness: Typically the least expensive option on the market.
- Variety of styles and colors: Offers a wide range of choices to match your home’s design.
- Ease of installation: Lightweight and simple to install, making them a preferred choice for many contractors.
Disadvantages include:
- Durability: Generally, they have a shorter lifespan (15-30 years) compared to other materials.
- Susceptibility to weather: Can crack or become damaged in extreme temperatures and high winds.
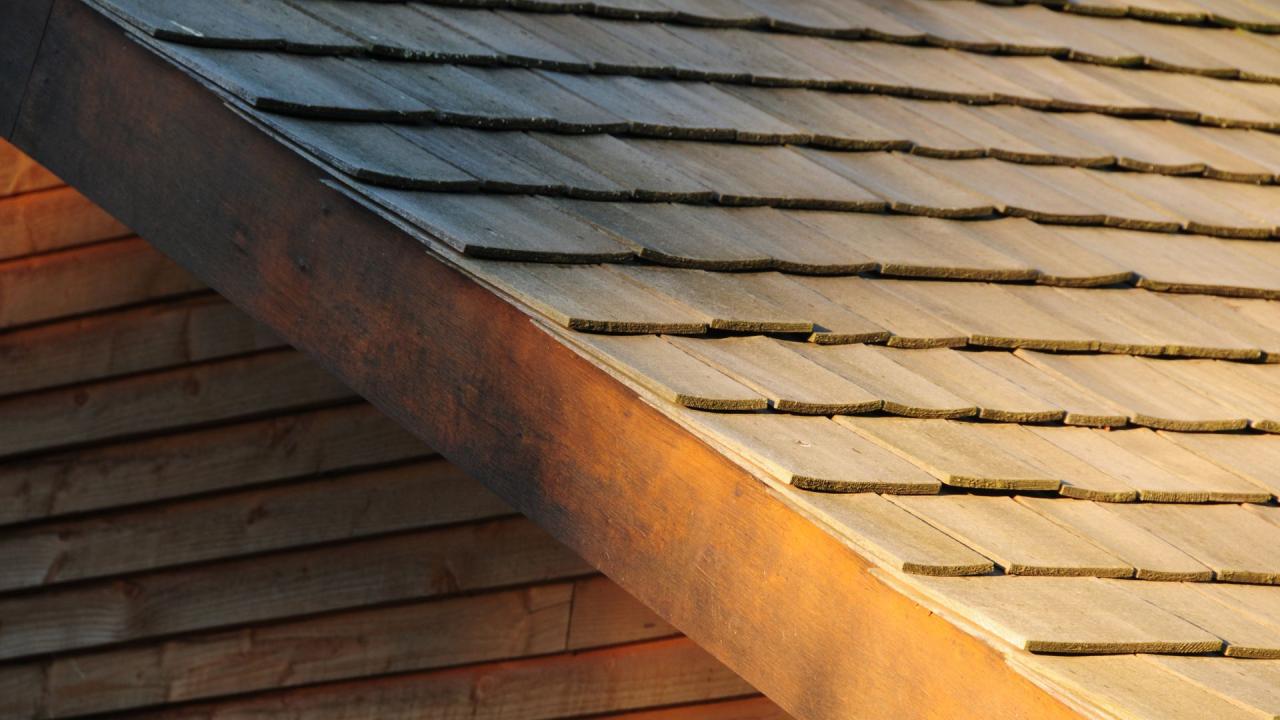
Wood Shingles
Wood shingles, often made from cedar or redwood, provide a natural look that enhances the beauty of a home. They are commonly used in areas where traditional style is desired.
Advantages:
- Natural aesthetic: Offers a classic and rustic appearance that many homeowners prefer.
- Insulation properties: Provides better insulation compared to asphalt shingles.
Disadvantages:
- Maintenance: Requires regular maintenance to prevent mold, rot, and insect damage.
- Fire risk: More flammable than other materials unless treated with fire retardants.
Metal Shingles
Metal shingles, made of materials like steel, aluminum, or copper, are gaining popularity due to their durability and energy efficiency.
Advantages:
- Longevity: Can last 40 years or more with proper maintenance.
- Energy efficiency: Reflects heat away from the home, reducing cooling costs.
Disadvantages:
- Initial cost: Higher upfront costs compared to asphalt and wood.
- Noise: Can be noisier during rain or hail unless insulated properly.
Slate Shingles
Slate shingles are made from natural stone and are recognized for their unmatched durability and elegance. They are primarily used in high-end homes.
Advantages:
- Exceptional lifespan: Can last over 100 years if installed correctly.
- Natural fire resistance: Provides excellent protection against fire and extreme weather.
Disadvantages:
- Weight: Very heavy, often requiring additional structural support.
- Cost: One of the most expensive options, both for materials and installation.
Best Practices for Selecting Roof Shingles
Selecting the right shingles depends on several factors, including climate conditions and the architectural style of your home. A few considerations include:
- Climate: Choose shingles that can withstand local weather patterns. For instance, asphalt may not hold up well in areas prone to extreme heat or snow.
- Home style: Consider shingles that complement the architectural design of your home. Traditional homes often look better with wood or slate, while modern designs may suit metal or asphalt.
- Building codes and HOA rules: Ensure compliance with local regulations and neighborhood guidelines regarding roofing materials.
Incorporating these considerations can help homeowners choose the appropriate shingles that balance aesthetics, performance, and longevity.
Installation Process of Roof Shingles
Installing roof shingles, particularly asphalt shingles, is a crucial step in ensuring the longevity and durability of your roofing system. A proper installation not only protects your home from the elements but also enhances its aesthetic appeal. Understanding the step-by-step process, along with the necessary tools and materials, can make this task more manageable and efficient.
The installation of asphalt shingles typically involves several key steps, each requiring attention to detail to ensure a successful outcome. The following guide Artikels the entire process from preparation to final inspection.
Step-by-Step Process for Installing Asphalt Shingles
Before starting the installation, it’s important to gather all the necessary tools and materials. The following list includes what you’ll need to ensure a smooth installation process:
- Asphalt shingles
- Underlayment (felt paper or synthetic)
- Roofing nails (galvanized or stainless steel)
- Roofing hammer or nail gun
- Utility knife
- Measuring tape
- Chalk line
- Safety harness and rope (for steep roofs)
- Roofing shingles starter strip
- Flashing (for chimneys, vents, and valleys)
Once you’ve assembled your tools and materials, follow these steps for installation:
- Preparation: Ensure the roof deck is clean, dry, and free of debris. Inspect for any damage and make necessary repairs.
- Install the Underlayment: Roll out the underlayment horizontally across the roof, overlapping each row by about 6 inches. Secure it with roofing nails.
- Lay the Starter Strip: Install a starter strip at the eaves. This helps seal the roof deck and provides a straight edge for the first row of shingles.
- Install the First Row of Shingles: Start at the bottom edge of the roof, aligning the shingles with the starter strip. Nail them in place at the recommended intervals.
- Continue with Subsequent Rows: Stagger the seams of the shingles in each row to avoid water penetration. Use a chalk line to keep rows straight.
- Install Flashing: Place flashing around chimneys, vents, and in roof valleys to prevent water leaks.
- Final Row and Ridge Cap: Install the final row of shingles and complete the ridge with ridge cap shingles for added protection.
- Inspection: Check for any loose shingles, exposed nails, or areas that may need additional sealing.
Safety Measures Checklist
Safety is paramount during the installation of roof shingles. Here’s a checklist to ensure all safety measures are followed:
- Wear a safety harness when working on steep roofs.
- Ensure ladders are stable and on a flat surface.
- Use non-slip footwear to prevent falls.
- Have a spotter when using ladders, especially on roofs that require height.
- Wear safety goggles and gloves to protect against sharp materials.
- Be cautious of weather conditions; avoid working in rain or high winds.
- Keep your work area clear of debris and tools to prevent tripping hazards.
By following these steps and safety measures, you can ensure a successful installation of asphalt shingles that will provide your home with protection for years to come.
Maintenance of Roof Shingles
Routine maintenance of roof shingles is crucial to extend their lifespan and maintain the overall integrity of your roof. Regular inspections and care can help identify minor issues before they escalate into costly repairs. It’s like giving your shingles a little TLC to keep them in top shape and protect your home from the elements.
To effectively maintain roof shingles, homeowners should be aware of specific tasks that can prolong their life. Regular cleaning, inspections, and timely repairs are essential. Here are some maintenance tasks to consider:
Routine Maintenance Tasks
Engaging in regular maintenance tasks can significantly enhance the longevity of your roof shingles. Here are some key practices to implement:
- Regular Inspections: Check your roof at least twice a year, preferably in spring and fall. Look for signs of damage, such as missing shingles, curling edges, or granule loss.
- Cleaning Debris: Remove leaves, branches, and other debris that can trap moisture. This prevents mold and algae growth, which can damage shingles over time.
- Gutter Maintenance: Keep gutters clear to ensure proper water drainage. Clogged gutters can lead to water pooling and increase the risk of shingle damage.
- Trimming Overhanging Branches: Maintain your trees to prevent branches from scraping or falling on your roof, causing potential damage to shingles.
Identifying Common Issues
Knowing how to identify common roofing problems early can save time and money on repairs. Homeowners should watch for the following signs:
- Curling Shingles: Shingles that are curling at the edges may indicate aging or poor ventilation. This can compromise water resistance and lead to leaks.
- Algae Growth: A dark streak on shingles is often a sign of algae. This not only affects aesthetics but can also lead to shingle decay if not addressed.
- Granule Loss: Inspect shingles for granules in gutters or downspouts. Excessive granule loss may indicate that shingles are nearing the end of their life.
- Visible Mold: Any signs of mold growth can indicate water retention or inadequate drainage, which could lead to further roofing issues.
Cleaning and Repairing Roof Shingles
Effective cleaning and repairs are vital for maintaining the performance of roof shingles. Here are some methods to consider:
- Cleaning Solutions: Use a mixture of water and bleach or vinegar to clean algae and mold. Apply the solution and allow it to sit before rinsing off with water. A pressure washer can also be used, but with caution to avoid damaging the shingles.
- Repairing Curling Shingles: For minor curling, gently lift the shingle, apply roofing adhesive underneath, and press it back into place. In cases of significant damage, replacement may be necessary.
- Replacing Missing Shingles: If shingles are missing, replace them promptly to prevent leaks. Carefully lift the shingles around the area, remove nails, and slide the new shingle into place, securing it with nails.
- Professional Help: For extensive damage or if you’re unsure about repairs, consider hiring a professional roofer to ensure the job is done correctly and safely.
Cost Factors Involved in Roof Shingle Projects
Understanding the costs associated with roof shingle projects is essential for homeowners who want to make informed decisions. Various components contribute to the total expense of purchasing and installing roof shingles, from the materials themselves to labor and additional fees. By examining these cost factors, homeowners can better plan their budgets and select the most suitable roofing solutions for their needs.
The total cost of a roof shingle project can be broken down into several key components. These include the cost of materials, labor, removal of old roofing, and various additional expenses that may arise during the project. Each of these elements plays a crucial role in the overall budget, making it important to assess them carefully before starting any roofing project.
Cost Components of Roof Shingle Projects
A clear understanding of each cost component involved in roof shingle projects helps homeowners budget more effectively. Here are the primary factors that affect costs:
- Material Costs: The type of shingles selected significantly impacts the overall expense. Asphalt shingles are typically the most affordable, while wood, metal, and slate shingles can be more expensive due to their higher material costs.
- Labor Costs: Labor costs can vary based on the complexity of the installation, the location, and the contractor’s expertise. Hiring experienced professionals may raise upfront costs but can lead to better long-term results.
- Removal of Old Roofing: If an existing roof needs to be removed, this adds to the cost. The disposal of old materials and additional labor required for this task can increase the overall budget.
- Permits and Inspections: Local regulations may require permits and inspections, which can add to the project cost. Ensuring compliance with these regulations is important to avoid future fines and issues.
- Additional Features: Features such as underlayment, flashing, and vents are crucial for optimal roofing performance but can add to the final cost. These components help protect the roof and prolong its lifespan.
Long-Term Financial Implications of Different Shingle Materials
When selecting shingle materials, it’s crucial to consider not just the initial investment but also the long-term costs associated with maintenance and replacement. Different materials have varying lifespans and performance characteristics, impacting their overall value.
For example, asphalt shingles generally have a lifespan of around 20-30 years and are lower in upfront cost. In contrast, metal roofs can last 40-70 years and often come with warranties that reflect their durability. Although the initial investment for metal roofing is higher, the long-term savings on repairs and replacements can make it a more economical choice over time.
“Investing in higher-quality roofing materials can lead to substantial savings on maintenance and replacement costs in the long run.”
Strategies for Budgeting and Finding Cost-Effective Roofing Solutions
To manage roofing costs effectively, homeowners can implement various strategies to stretch their budgets while ensuring quality. Here are some practical approaches:
- Get Multiple Quotes: Obtain estimates from several contractors to compare pricing and services. This not only helps in finding competitive rates but also allows evaluation of contractor reputations.
- Consider Off-Season Installation: Scheduling roofing projects during off-peak seasons can lead to discounted rates and more availability of skilled labor.
- Opt for Standard Sizes: Using standard sizes of shingles can reduce waste and lower material costs, as custom sizes are typically more expensive.
- Explore Financing Options: Many contractors offer financing plans or payment options that can make larger projects more manageable over time.
- Prioritize Repairs Over Replacement: If your roof is relatively new but has minor issues, addressing repairs might be more cost-effective than a full replacement.
If you’re looking to spice up your home’s exterior, consider a tin roof. It’s not only stylish but also durable and can withstand harsh weather conditions. Plus, the shiny surface adds a unique charm. On the other hand, if you want something more modern, metal roofing offers longevity and a sleek look, making it a great investment for your property.
Thinking about updating your roof? A metal roofing option could be your best bet. It’s incredibly sturdy and can handle a variety of weather, plus it’s energy efficient. If you’re leaning towards a more classic vibe, don’t overlook the charm of a tin roof , which can bring a rustic yet trendy feel to your home.